Salad Bar + Quick & Easy Dressings

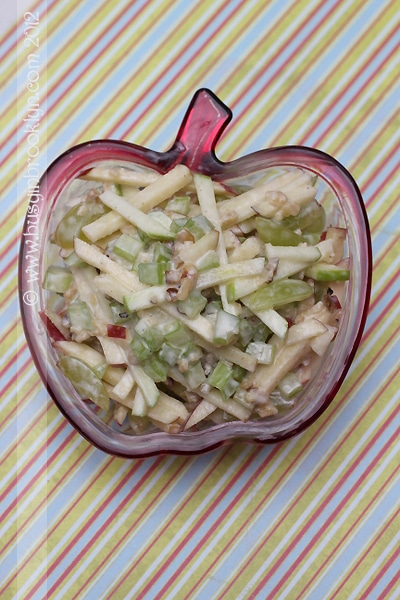
I can’t tell you how many people I meet who tell me that they just can’t figure out what kind of salad to put together at a salad bar. They usually end up going with classic caeser or greek salad. I, on the other hand, love experimenting with different ingredients and coming up with all sorts of flavor combinations. Otherwise, I’ll just get bored and dread my salad-eating :)

My all time favorite make-you-own-salad-bar combo would have to be:

crisp rommaine
red cabbage
shredded carrots
beets
craisins
red onions
scoop of tuna

For the dressing, I opt for caeser or honey mustard. To make your own at home, follow my easy recipes below.
I thought it might be fun to see what unique salad combinations you all come up with at a salad bar. To get you in the sharing mood, I’m giving away the book of 500 Sensational Salads by Julia Canning. To enter this giveaway, let me know your favorite make-you-own-salad-bar combination in the comments below. I will choose the most original submission on February 15, 2012.


Post a Comment

Cheesy Stuffed Mini Peppers


At one of our Chanukah parties recently (was Chanukah really that recent? It feels like ages ago!), my sister in-law decided to bring over some food for the low-carb dieters at the party. I was really intrigued by her idea of making stuffed shells without the pasta. Mini peppers stand in as a great replacement, adding color and sweetness to the dish. I decided to whip up my own variation by peppering up (pun intended!) a version of my mom’s famous lasagna recipe. Truth be told – I still made some stuffed shells for my pasta-loving kids, but I was more than satisfied with my lighter and lower-carb variation.
1 year ago: spinach pasta

Post a Comment

Headbands, Bows & Clips


If you have little girls, you know what it’s like when they come home from school with yet another broken headband (or better yet, without their headband…this I can’t help you with). I’ve even started a little bin with all those bows that won’t snap closed, the ribbons that have unraveled, and the headbands that have all but fallen apart. Every couple of months, I go through my stash and bring new life to the tangled mess.

To do this, you’ll need your own assortment of ribbons, headbands and embellishments. I always keep my eyes open for these when I’m in a Family Dollar or a cheap variety store. You can stock up on plain headbands, cheap ribbons and buttons to keep for future projects. There are no instructions for these – just heat up your glue gun and get creative!


Every pretty bow starts off with a clip. Alligator clips are easy to use and don’t break as easily as others. You can purchase them on Etsy. For a finished look, you’ll want to cover it in ribbon. You can embellish them with buttons, crystals and beads. Here’s how!

First, you’ll need to measure your ribbon to see how long it should be. Place the ribbon inside the clip. Close the clip and wrap the ribbon around, leaving some room around the indent where the spring is. The ribbon should end at the back of the clip, right on top of the opening (see picture). Cut ribbon to size. To remove the frayed edges, hold the ribbon close to candle (don’t put inside the fire, just very close to the heat), you’ll see the thread start to shrivel up. Now, repeat the same steps you did to measure the ribbon, but this time use your hot glue gun to glue it down (see picture). Embellish your ribbon clip with buttons, embellishments or a bow.


1 year ago: shell stitch crochet hat

Post a Comment

It’s our Blogoversary!
Celebrate with {Mulled Wine}

We’ve come a long way since my first post back on January 19th, 2011. Believe me, I never imagined I would make it this far. What started out as a hobby has blossomed into a full blown passion. I’m so thankful to all of my readers who are the reason for my continued success.

Over the past year, BIB has grown considerably, with recipes featured throughout the blogosphere as well as in Bitayavon and Binah Magazines. With bated breath, Busy in Brooklyn finished in 5th place in the Joy of Kosher “2011 Best of Kosher” competition with almost 850 votes.

It’s been a whirlwind! Here are some stats from the past year that I thought you might enjoy:

Most popular category: dessert recipes
Most popular recipe: sushi salad
Most popular craft: shell stitch crochet hat
Most popular how to: caramelize apples
Most commented: black bean brownies

I can’t wait to see what the next year has in store! In the meantime, keep reading, keep cooking, and most importantly, keep commenting! Your feedback really gives me the push I need to keep going!

Do you want to give BIB a Blogoversary present? Share our page on your facebook wall and ask friends to like us and visit our blog!

And now, to celebrate! I figured we should all make a L’chaim to toast to our one year Blogoversary. But a plain old glass of wine just wouldn’t do. Instead, we’re gonna click our glasses with a warm cup of mulled wine. Mulled wine is a spiced red wine that has been warmed with spices and citrus. It is perfect for a cold winter night in which you have cause to celebrate.

The best part about making mulled wine (also known as glogg) is that you don’t need to use an expensive bottle. You can use a combination of whatever whole spices you have on hand, or simply use a few spoons of your bisamim.

Traditionally, mulled wine includes the following:

} dry red wine or a combination of dry and sweet (port is best)
} sweetener, such as, white sugar, brown sugar, maple syrup, honey or agave
} juice and zest of citrus, such as orange and/or lemon
} additional alcohol of choice, such as vodka or brandy, (optional)
} dried fruit, raisins, and/or almonds (optional)
} a combination of whole spices, such as:

cinnamon sticks
cardamom pods
cloves
allspice berries
peppercorns
star anise
bay leaves
nutmeg
vanilla pods
ginger root

I prefer to wrap up the spices in a cheesecloth but you can also add them straight to the pot and strain before serving.


1 year ago: chicken breast with port wine cherry sauce

Post a Comment

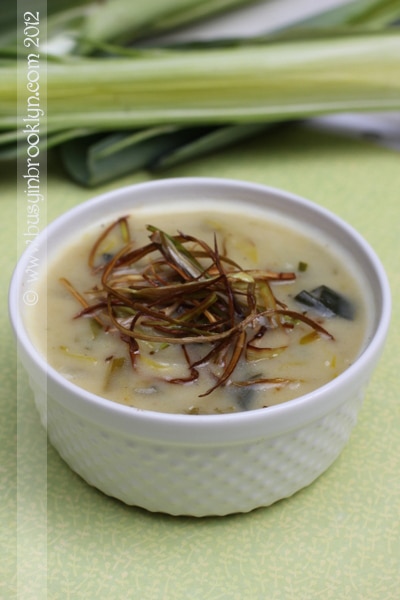
Wild Mushroom Barley Soup

I remember the first time I made mushroom barley soup. I was having a large group of people over for a simcha and I decided to whip up a batch of the hearty soup. Having never made it before, I underestimated how much the barley would expand. Lets just say it was more of a cream of barley soup than a mushroom anything. I have since learned my lesson and to be sure of myself, I cook the barley separately and add it the soup once it’s already tender.

But that’s not the only thing that makes this soup anything but average. Instead of serving up a bowl of soup with a puddle of grease floating on top (you all know what I’m talking about), I blend the soup using only half of the barley. Since my kids wouldn’t normally eat mushrooms, blending it makes for a perfect disguise and they don’t have to miss out on this delicious recipe. After blending, I add in the remaining barley for added texture in every bite.

Post a Comment