How to Make Pesto
Spinach, Walnut & Cheddar Pesto


With Shavuous just two weeks away, I thought it would be a good idea to do a little tutorial on making pesto. I’m sure most of you have either tasted it or have at least seen it on a restaurant menu. The popular green sauce is traditionally made from a mixture of basil leaves, pine nuts, garlic, parmesan cheese, and olive oil. Pesto is surprisingly easy to prepare, as well as delicious and versatile. It can be used as a sauce for fish and pasta or as a spread over crackers and bread. It makes the perfect addition to your Shavuous menu.

Because pesto is a sauce made from raw ingredients, it’s important to use those that are fresh and good quality. Fresh garlic (no frozen garlic cubes!), herbs and extra virgin olive oil are a must! It is also a good idea to toast your nuts beforehand as it brings out their natural oils and intensifies their flavor.

While pesto is usually made from basil, pine nuts and parmesan, you can make pesto using a combination of any greens, nuts and cheeses. The basic components of any pesto include the following:

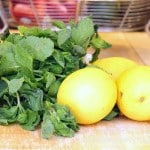
fresh leafy greens (basil, spinach, arugula) or herbs (parsley, mint, cilantro)  or mixed
nuts (walnuts, hazelnuts, almonds, macadamia nuts, pumpkin seeds, pine nuts, pistachios)
cheese (parmesan, romano, cheddar  or any dry, hard cheese)
acid (lemon, lime, red wine vinegar, sherry vinegar)
oil (extra virgin olive oil, grapeseed, walnut, hazelnut)
seasoning (fresh garlic, salt, pepper)

Once you have your ingredients, the pesto can be prepared by hand, using a mortar and pestle, or with a food processor or blender.

Basic Pesto Measurements:

3 cups packed fresh leafy greens
½ cup toasted nuts
1/2 cup grated parmesan (omit if making nondairy)
2 garlic cloves, peeled
1 tbsp fresh squeezed lemon juice
1/3-1 cup extra virgin olive oil
kosher salt and pepper, to taste

Pesto Tips & Tricks:

* If you toast your nuts before using (it’s worth the extra step), make sure to cool them off before adding them to the food processor. Otherwise, the heat from the nuts will start to melt the cheese and your pesto will turn gummy.

* To keep your pesto from turning black in the fridge, cover it with an inch of olive oil. Just pour off the excess oil before serving.

* Leftover pesto can be frozen for future use. Just pour pesto into an ice cube tray for individual servings. Once it’s frozen, add the cubes to a ziploc bag.

What are some of your favorite pesto combinations? Share them with me in the comments below!


1 year ago: home-made fish sticks

Post a Comment

Waldorf Salad with Yogurt Dressing

Like me, I’m sure most of your Shavuous menus will involve some sort of pasta and blintzes, and with cheesecake for dessert, there’s not much room for a heavy appetizer. Instead of serving up a bowl of cheesy french onion soup, give waldorf salad a try. It is a welcome addition to the otherwise heavy menu. With sweet & tart apples, crunchy celery, walnuts and grapes in a light yogurt dressing, this salad offers a refreshing start to your Shavuous meal.

Post a Comment

Carrot Muffins

You all know that I’m not that much of a baker, so if I decided to make carrot muffins, there must have been a reason for it. Well, here it goes…

Sometimes things just don’t go as planned. Take this past Shabbos, for example. I had a full house for the weekend, and my menu was planned down to the tee. I usually leave the salad prep to right before the meal, preparing only what needs to be checked or processed in the blender beforehand. I had planned on making a slaw, so I shredded my carrots in my food processor and put it aside in a ziploc. Fastforward a couple of hours and I’m about to prepare the salad. I grab a jar of mayo from my pantry and open it up to find that someone has taken out a spoonful and returned it to the pantry instead of the fridge. I’m afraid to admit that that someone was probably me getting a headstart on my cooking at 12 PM the previous night! So now that there was no mayo, there was no slaw (or caeser salad…or deviled eggs…). Then I realized that we were also out of horseradish for the gefilte fish. While I would normally whip up a russian style dressing, that was not in the cards either. So I served the gefilte fish with wasabi sauce, stashed the shredded carrots back into the fridge, and redid my menu just as my guests were walking through the door.

My mayo-less meal turned out just fine, and that lonely bag of carrots had a calling after all – moist and delicious carrot muffins. You can also bake this into a cake and top with some cream cheese frosting (which I would have done, had I not shredded my carrots in my fleishig food processor). Either way you choose to serve it, you’ll find this recipe delicious. My kids were so excited to come home to freshly baked muffins. I think I have to start doing this baking thing more often!


1 year ago: sundried tomato olive tapenade


Post a Comment

Crocheted Pacifier Clip

When I haven’t crocheted in while, I always think I’m going to forget what to do. But honestly, it’s just like riding a bike. The second I put that crochet hook into my hands, it just goes. In this case, my friend had recently had her 5th child and being her fourth boy, I just did not know what to get her. She had all the baby equipment she needed, all the toys you could think of, and plenty of boy clothes to go around. So I asked her straight out and all she really wanted was a pacifier clip (and help with making dinner!) Helping with the food was a given, but I also wanted to make her gift a personal one. Crocheting the pacifier clip made for an adorable gift and gave it the personal touch I was looking for.

This crochet project is super easy and perfect for beginners. You can use any yarn scraps you have lying around as well.

Supplies:

size f hook
worsted weight yarn in 2 colors
Tapestry needle
pacifier clip (available on Etsy)
buttons or other decorative accents

How to:

Crochet a chain of 30 stitches. Single crochet (sc) in each stitch across. Repeat until you have reached exactly the width of the loop of your pacifier clip (should be 4-5 rows). With a contrasting color, slip stitch all around and weave in the ends with a tapestry needle.

Pull the top of the crocheted strip through the loop of the pacifier clip and fold over. Sew the folded edge down with a tapestry needle.

To form the loop that holds the pacifier clip, crochet a chain of about 18 stitches. Slip stitch through each stitch to reinforce the chain. With a tapestry needle and some strap yarn, attach the chain to the ends of the strip you made earlier, forming a loop (or you can just continue to crochet into it and secure together with a chain or two).

Decorate the top of the pacifier clip with a button, applique or decoration of choice (that complements the colors of your yarn).

To attach the pacifier to the crocheted loop, pull the loop through the pacifier ring and pull the opposite end of the pacifier clip around the ring and through the loop. Pull to tighten.

1 year ago: headbands in a pinch

Post a Comment

BBQ Chicken & Pineapple Jalapeno Pizza

I’m not usually one for making yeast doughs. I mean, it’s not like I can’t do it, it’s just that I can’t be bothered. With all of the flour mess and sticky dough, I usually just leave it to the companies who prepare the frozen variety. This week, however, the rainy weather was a good excuse to play around in the kitchen. And my leftover hickory BBQ chicken was the perfect inspiration for this dish.

I have to tell you that with Fleischmann’s Pizza Crust Yeast, making the dough was super easy. There was no rising time. Simply mix, knead, top and bake. I don’t think I can go back to freezer pizza dough again!

Obviously, cheese on this pizza would probably be delicious but because I’m kosher, I have to leave it out. If you’re brave, you can try using soy cheese but personally that stuff freaks me out!

1 year ago: BBQ pulled chicken sandwiches

Post a Comment