Author: chanie

Parsnip Honey Cake with Honey Cream Cheese Frosting & Rainbow Carrot Chips

I’m not a baker. Let me start with that. Sure I can follow a cake recipe. And I’ve even made the occasional Elmo and Barbie cake for my kids birthdays. But I don’t “bake”. Especially not cakes like THIS.

I don’t know what it is. The whole layering thing. And the frosting. It’s just such a MESS. Case in point: I decided to defy all logic and attempted to layer my cakes without trimming them first, so that they were flat. Of course the layers started slipping and sliding, so I had to separate them, post-frosting and then do the trimming. Mess is not the word. My kids were pretty happy though. They got to enjoy the best part of the honey cake (the sticky top layer), all smothered in frosting.

Now since this IS a honey cake, trimming the best part off the layers is such a sin. So I highly recommend you follow this technique so that the layers bake flat. Wish I had followed my own advice but I just get lazy when it comes to baking.


Case #2 in point, I let my frosting sit out after whipping it, and it got kinda warm and runny, but instead of refrigerating it so that it would hold up nicely, I just wanted to stack the cake already. THIS is why I don’t bake. No patience. Baking is all about precision, patience and organization, and while I do possess those qualities, baking does not exactly bring them out in me. Maybe it’s because I just want to get it done so I can dig in to the cake already!

So why this cake? Well, I came up with this crazy cool concept of doing a carrot cake/honey cake hybrid. And if that wasn’t enough, I had to switch up the carrots for parsnips, and take it over the top with FRIED RAINBOW CARROTS STRIPS. It’s go big or go home. Especially if I am about to make a layered cake!

I developed this recipe in honor of Rosh Hashanah, when it is traditional to eat honey cake, for a Sweet New Year. Since many people have a custom not to eat nuts on Rosh Hashanah, I knew I couldn’t garnish my cake with chopped pecans, which would have been my first choice. Shredded coconut is another great option but I wanted a little hint to the surprise inside the cake – the parsnips!

Honestly, I can’t say this cake tastes like parsnips. It tastes like honey cake. But when you get a couple of shreds of parsnip in your mouth, you get a little hint of flavor. If you want more of a parsnip flavor, add some more shredded parsnips to the cake. It’s as simple as that :)

I honestly could not be happier about the way this cake came out. I totally winged the recipe, and not understanding the science of baking, it could have been a complete flop. I was almost not expecting the cake to work but it came out so unbelievably moist! And my kids kept running downstairs wanting to know what smelled so INCREDIBLE.


I KNOW this cake is good for one reason and one reason only. The world’s most pickiest taste testers LOVED IT. My kids gobbled up the cake, licked their fingers, and said OH MY G-D between fork fulls. I kid you not. This is a home run. Kid tested. Mother approved.

Related Recipes:

honey cake with caramelized apples
carrot muffins
couscous with thyme, honey roasted parsnips, carrots & beets
pumpkin whoopie pies with maple cream cheese frosting

Post a Comment

Honey Hasselback Baked Apples
with Brie & Pecan Streusel


I heart brie. I never thought I could be a semi-moldy-cheese kinda girl but here. I. am.


When Natural & Kosher Cheese asked me to go all Rosh-Hashanah-out on their brie, I was only too happy to oblige. I knew I had to do something with apple & honey, because besides being the symbol for a Sweet New Year, fruit and honey just go so well with brie! Case in point: these dried fruit brie bites. Mmm mmm good.

If moldy cheese and fruit sound gross to you, let me tell you this: I did a cheese demo a few months back, and I had a room full of people who thought the same. Many of them had never tried brie before, and they had no plans to. But after watching me make my brie en croute with homemade fig jam, they warmed up to the idea of melted gooey cheese smothered in sweet fruit. A few bites later they were all over it, stinky cheese and all!


If you’re still on the fence, let me assure you that when I say stinky cheese, I don’t mean bleu-cheese-style. I would NEVER go near that stuff! Brie has an edible white rind that, yes, does have mold in it, but it is oh so mild. You can always cut it off if you want to get to the gooey interior of the cheese minus the (slight) funk.

Now that we’ve (hopefully) got you passed the brie, can we please discuss the hasselbacking? Y’all know I’m kinda obsessed with hasselback anything. And after this hasselback salami, now you all are too! I promised myself I’d be hasselbacking lots of other foods, and after seeing this video on cookinglight, I was all over hasselbacking my apples! How gorgeous are they? Gosh, I have so many hasselback ideas up my chef sleeve, I can’t wait to share them with you!


Now if you want to skip the brie on these and just go pareve for a fantastic dessert, feel free to leave out the cheese and use margarine or coconut oil in place of the butter. Top it off with some ice cream and you’ve got yourself a golden dessert for your holiday meal! (Or, do yourself a favor and stick to the cheese, and serve this up for a special Rosh Hashanah breakfast!).


This post was sponsored by Natural & Kosher Cheese. Follow them on FacebookTwitter, Pinterest, Instagram, YouTube, Google+, or via their Blog

Related Recipes:

apple and honey tart
hasselback sweet potatoes with apples
dried fruit brie bites

Post a Comment

Honey Fig Roasted Salmon

Excuse me while I type while my mouth is full. [gulp]

I don’t usually eat the recipe I’m posting while I’m posting it, but I seriously can’t get enough of this salmon. Who knew figs and salmon would go so well together, right?

The truth is, I would eat figs over cardboard. They’re that good. And with Rosh Hashanah coming, I couldn’t think of a sweeter fruit to incorporate into my holiday meal. Fig season is short, and I want to make the most of it before it’s gone!

It’s hard to believe that summer is really coming to an end, and the High Holidays are almost upon us. I see it in the seasonal fruit that’s making it’s way into the stores (yay for honeycrisp apples!), I feel it while I shop around for school supplies, uniforms and Yom Tov clothes. And I even smell it in the air as the summer days turn to cool nights, and the scent of fall creeps in. It’s sad to see summer go, but the New Year brings with it a fresh start and new possibilities.

I feel about the The High Holidays, the same way I feel about the first day of school. It gives me butterflies. And even though I’m way past the school-era (thank G-d!!), I still get those butterflies when I take my kids to orientation on the first day. I never realized the benefits of marrying someone whose last name begins with an “A”, until my kids started school. Thankfully, I don’t have to sit there for hours until their name is called!

I may not be in school anymore, but the truth is, my name is still called, each year, on high. As we read in the prayer of “Unesanneh Tokef“, “All created beings pass before you, one-by-one, like a flock of sheep…You count, reckon, and are mindful of them, and you allocate the fixed portion for the needs of all your creatures”.

May we all be blessed, that as our names gets called by the ultimate principal, may we be inscribed for a SWEET (and figgy) New Year filled with healthy, happiness, peace and of course, good food!

I’d like to think that this holiday isn’t just about the food, but the truth is, it is so much a part of it. We celebrate Rosh Hashanah through an assortment of symbolic foods, including the head of a fish and sweet, sticky honey. This recipe uses a whole side of salmon, but you can feel free to cook the fish head along with it, for a beautiful presentation. I love how festive and elegant this is, not to mention sweet! It is sure to be a show stopper on your holiday table.

Related Recipes:

teriyaki salmon
honey mustard salmon
honey roasted figs
holiday salad with figs and honey

Post a Comment

Sous-Vide Honey Lavender Chicken
with Apricot Salsa

Ah, sous-vide, the intimidating, yet popular, modernist cooking technique. What is it, and how do you do it? What are the benefits of sous vide cooking and is it safe? Read on.

I’m a strong believer in keeping with the times, especially in your field of work. As a food blogger-turned-chef, I can’t help but notice that SousVide is everywhere. From home cooks to professional chefs, everyone is doing it! I was having some serious sous-vide fomo when the folks over at Sous Vide Supreme sent me their SousVide Supreme Promo Pack to try, complete with a water oven, vacuum sealer, pouches and their easy sous vide cookbook. I was apprehensive, to say the least. In fact, the machine sat unopened for a couple of weeks until I finally mustered up the courage to get started. Why was I so intimidated by a water bath machine? Read on.


Sous vide, which means, “under vacuum” is a method of cooking in which food is vacuum sealed in plastic bags and then cooked in a temperature-controlled water bath. Once your food reaches your desired temperature, it can be held at that temperature for hours, so you can put up a steak in the morning, and come home to a perfectly cooked medium-rare piece of meat (as opposed to a crockpot, which would turn the steak into a pot roast). Being able to cook food to an exact temperature is a chef’s dream, but cooking it at a low temperature where bacteria are prone to breed, is also a nightmare.

One of the most important things you learn in culinary school is food safety. When I attended the Center for Kosher Culinary Arts back in 2013, I opted to take a food safety and sanitation course, where I learned all the guidelines for safe food handling. I am now certified by the National Restaurant Association as well as the NYC Dept. of Health as having trained in food safety. The course, and the following exam, were not easy. I had to memorize all sorts of bacteria, corresponding illnesses, different degrees and temperatures at which bacteria grows, etc. I’m proud to say that I passed with flying colors (having gotten only 1 question wrong), but I also took plenty of neuroses home with me! Having trained in food safety, I have become so careful about the way that I handle food, and also a bit neurotic about the way people around me do too. When you realize that foodborne illness can literally lead to death, it becomes a serious threat!

Why am I sharing all this? Well…one of the key elements of food safety is TCS: temperature control for safety. To keep food safe from bacteria, you need to keep your food at a safe temperature. The danger zone, where food is prone to bacteria growth, is 40-140 degrees Fahrenheit. Often, when cooking sous-vide, food is cooked at these low temperatures for long periods of time. Red flag anyone?! Well, it turns out, that after researching this I learned about the logarithmic decay curve. Food safety is a function of both temperature and time. This means, that pasteurization can happen at a lower temperature, it will just take longer. You probably know that it’s recommended for chicken to be cooked to 165 degrees, and that’s because, at that temperature, chicken is sterilized instantly, but pasteurization actually begins at 126.5 degrees. So you can actually cook chicken safely at 140 degrees, it will just take longer to pasteurize (about 45 minutes or so). This is why it’s important to follow the recommended minimum cooking times for food from the manufacturer of your sous-vide machine.

OK, so now that we can agree that sous-vide food won’t kill you, lets discuss the PROS & CONS!

Some of the benefits of sous-vide cooking include:

You can cook your food to the perfect desired temperature.
Say you want perfectly medium steak, you cook it at 135 for 1-4 hours and you get perfectly. medium. steak.

Your food is cooked evenly.
You know how when you grill or broil a steak, or even a burger, the outside is slightly overdone, while the inside is just how you like it? Well with sous-vide, it’s all exactly how you like it, through and through.

You get a larger yield.
You know how when you braise an expensive roast, you open the pot and wonder where half of the roast has gone? The meat shrinks during cooking and you’re left with half of it’s original size. When cooking sous-vide, shrinkage is greatly reduced, so you get more for your money.

You can set it and forget it. 
Unlike a slowcooker, sous-vide cooking allows you to put up your dinner in the morning without it being reduced to mush by the time you get home. Imagine putting up some eggs, running to the bakery for fresh bread, picking up some coffee and then coming home to perfectly runny eggs an hour later. {Insert egg emoji here}

It enhances flavors.
Vacuum sealing the food seals in flavors, so when you make things like honey lavendar chicken, you can actually taste the honey and the lavender!

It does wonders for veggies.
One of my favorite ways to cook vegetables is via blanching. Blanching locks in the bright color of the veggies and keeps them perfectly tender-crisp. You get the same with sous-vide, minus the ice water bath.

What I didn’t like about the sous vide process:

It takes forever to heat up.
Getting the water bath to reach your desired temperature takes a ridiculously long amount of time. It helps to start with hot water, which greatly reduces the preheating time.

Say goodbye to pan-gravy.
With sous-vide, you get the benefits of poaching (extremely tender proteins), but you lose out on the delicious flavor compounds that develop when searing and roasting. For this reason, some chefs recommend searing your meat or chicken before cooking sous-vide, to enhance the flavor. Alternatively, you may also finish your cooked food with a quick sear (as I did with this recipe) for crispy texture, added color and flavor.

Temperatures can fluctuate.
If sous-vide is about temperature control, I’d imagine that it should be able to do just that – control the temperature. I was surprised to see fluctuations in the temperature, however minor, during cooking. One reader suggested putting a layer of bubble wrap over the water bath to prevent evaporative cooling.

Some foods float in the bath.
Sous-vide machines are often called immersion circulators because it circulates and heats the water bath around the food. They key is that the food is immersed in the water bath, and that is how it cooks. However, certain foods, especially vegetables, float to the top, not allowing them to cook properly. One solution, is to use the rack that’s included in the machine, to hold the food in place under the bath, or, a chef once recommended vacuum sealing some butter knives and using them as a tool to weigh down the food.

Flavors can be too pronounced.
The fact that vacuum sealing enhances flavors is a definite pro, but it can also have less than favorable results. Certain ingredients don’t work well when their flavor is magnified, such as bay leaf, or alcohol, which can give food a drunken flavor. Even the lavender I used in this recipe is pronounced, but at just 1/2 tsp, I found the flavor to be pleasant.

It’s potentially unsafe.
As mentioned above, cooking food in the temperature danger zone (40-140 degrees) provides a environment for pathogens to grow rapidly. If you’re not careful about cooking times (as specified by the product manufacturer), your food can become contaminated. In addition, if your food is not properly vacuum sealed, or your food becomes contaminated during prep, cooking sous-vide poses an additional threat. It’s also important to mention that you must use vacuum bags that have been designed specifically for sous-vide use as some plastics can leach out chemicals into the food.

Want to learn more about how to cook sous vide chicken? I found THIS GUIDE extremely helpful! Their egg and meat guides are a must-read too!

Want to try sous-vide at home and don’t have a sous-vide machine? Learn about the stovetop method using Ziploc bags here!

Do you have any sous vide tips, tricks or recipes to share? Post them in the comments below!


This post was sponsored by Sous Vide Supreme. All opinions are my own. 

Post a Comment
Maple Lemonade

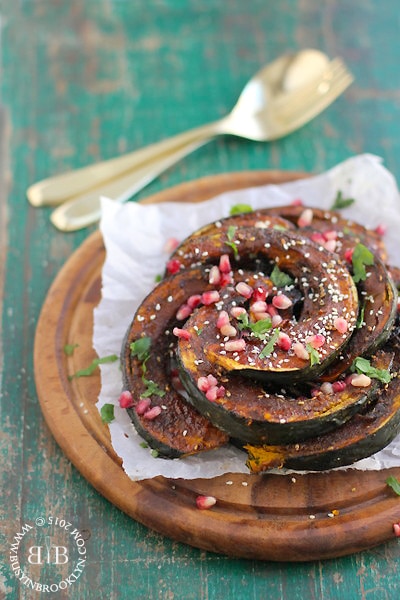
I’ve got a budding entrepreneur on my hands! My oldest daughter has been dreaming up business ideas since she was four. At nine, she’s already lined up her classmates to work in her salon (which she named, “Make It Up”) and she’s been saving up her Chanukah gelt for years! Entrepreneurial spirit is definitely in the genes, so it’s no surprise that she’s so business-minded.

When the weather starts to warm up, my little businesswoman starts dreaming up her lemonade-stand strategy. This year, she decided to sell brownies and saltwater taffy in addition to watermelon lemonade. Pink lemonade is always a good seller with the kids, and it’s so much fun to watch their faces when they take their first sip. We’ve done watermelon limeade before, so we went with lemonade this time. I made some chewy brownies with colored sprinkles and we headed to the Bay Parkway waterfront to set up our stand. It was such fun to watch my daughter in action! She would light up with every customer, and she took each sale so seriously. The passersby were so impressed! She netted $30.75 profit, which she put aside with all her savings, after tipping her sister $5 for helping.

My kids are huge lemonade fans, and not just for selling. Our absolute favorite recipe is one that I tasted at one of Levana Kirschenbaum’s cooking demo’s. She actually made it for my kid’s camp last year and I’ve been making it ever since. Traditionally, lemonade is made by making a syrup out of sugar and water, but with Levana’s maple version, there’s no need for that! I also love that the maple syrup is a natural sweetener, so it’s healthier than the traditional. Thanks to Levana for allowing me to share this recipe with you all!


Related Recipes:

strawberry limonana
watermelon limeade
cherry basil limonana

Post a Comment