Vegetarian Chili & Cornbread

For one week of the summer, I welcome the opportunity to put on my dairy apron, which usually collects dust until Shavuous comes around. Lighter meals of grilled fish and salads are also appreciated on these hot summer days. But for some serious meat eaters, the nine days* can be a challenging time. I know, because my husband is one of them. If he comes home from a long day of work to a pot of mac and cheese, he takes a bite and then asks for the next course. To him, a meal without meat is not a meal at all. The good news is, meat-eaters can still enjoy some hearty dishes, albeit without the 6-hour wait tag.

Vegetarian chili is a great option for the nine days because it is so versatile. You can serve it up in a burrito, over baked potatoes, or as a base for shepherds pie. You can also go the classic route and eat it alongside cornbread, or go Mexican with a tray of enchilada’s. Usually, chili needs to cook for several hours, but because I don’t like to sit over a hot stove in the summer, I’ve come up with a great recipe that doesn’t require endless hours on the stove.

For more great Nine Days ideas, including other meat-lovers recipes, visit the new Nine Days category.

You can also check out my new Nine Day Album on Facebook for great dairy and pareve recipes that are not on the blog.

*The Nine Days is a mourning period over the destruction of the Holy Temple. During this time, observant Jews abstain from eating meat and drinking wine as well as other joyous activities.

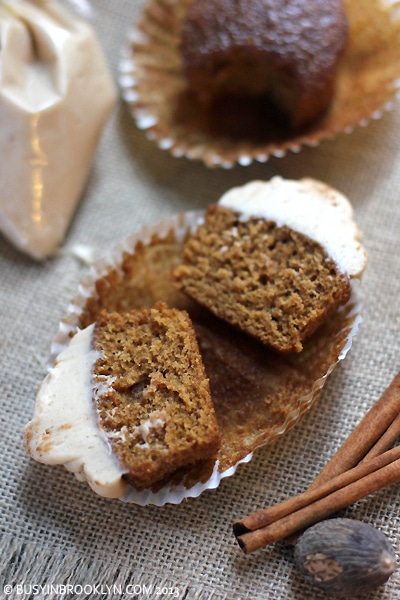
To me, chili without cornbread is like a hot dog without mustard. It’s just a must-have! It took a long time for me to come up with the perfect cornbread recipe that is moist, not too sweet, and, well…corny (you know I mean that in the taste of corn sense). The combination of coconut milk and creamed corn keep the cornbread moist and pareve. That means you get to whip them up with some REAL meat chili when the Nine Days are up!

I mentioned lots of fun ways to use chili earlier in the post, but I especially love this one-dish-meal option. You can choose to layer the chili into a square baking dish, or serve them up in individual mason jars for a fun twist. Since the cornbread is cooked on top of the chili (and will rise during baking), I only use half of my cornbread recipe for it. You can use the remaining batter for cupcakes or double up the chili recipe, and make 2 pies.

1 year ago: Corn Flake crunch ice cream
2 years ago: sushi salad II

Post a Comment

Governor’s Island

It’s been a while since my last post about a fun family getaway. In fact, I haven’t shared anything with you since last year’s post on Kelder’s Farm (which I still highly recommend!)

On a recent Sunday in Brooklyn, my family and I decided to head over to Governor’s Island for a day of family fun. We had been there previously, so we knew just what to expect – interesting exhibits, fun activities and great time for the whole family. I grabbed my SLR so I could snap and share photos of my experience with you.

Governor’s Island,  a 172 acre island in the heart of New York Harbor, was once home to the US army and coast guard. Many of it’s historic houses and buildings have remained intact since the 19th century. Just 400 yards from the Brooklyn waterfront, the island is accessible via ferry from Pier 6 (at the intersection of Atlantic Avenue and Columbia Street.)

After a fun ride on the ferry, you’ll arrive at the the Island where you can pick up a map and a schedule of the day’s activities from the information center.

A quick look at the map will show you that most of Governor’s Island is actually under construction, with amazing things in the works. You can read more about that here.

Still, there is still so much to do! At the Island’s center is Nolan park, a hub of fun activity for kids of all ages.

My kids couldn’t wait to climb the adorable hand-painted tree house, with little hiding spaces, and a slide. Doesn’t every little kid dream about having their own little tree house?

Your kids can also enjoy a game of mini golf, with an amazing artist-designed golf course. Each golf hole is another unique experience with imaginative and innovative design.

Here’s just one example of the colorful and fun designs incorporated into each and every hole.

Your kids will probably be hungry by now, so it’s a great idea to pack a picnic basket full of goodies, which is just what we did! On our menu: fresh pita or whole grain rolls with tuna or hummus, sliced peppers and grape tomatoes. For dessert: fresh fruit, homemade smores cookies and mini bags of popcorn. Don’t forget to stay hyrdrated! We brought along lots of water bottles and juice boxes.

After lunch, it’s time to explore some of the unique structures in Nolan park like this interesting “tunnel” or cloud.

If you look closely, you’ll see that it’s actually made up of recycled milk jugs and water bottles!

There are lots of other fun and interesting projects to see, designed by FIGMENT.

Like these stationary bouncing ball. They were one of my kids favorite areas, I couldn’t get them away!

And of course there’s the natural beauty, like this blackberry tree that stood humbly among the brightly colored fixtures all around.

After an exciting time at Nolan park, it’s time to experience some more of the Island on a family bike!

You can also stop by one of the many exhibits held in yellow colonial houses. The exhibits are constantly changing. You can view Governor’s Island’s calendar here for the current ones.

If you’re ready for a snack, there’s always a line-up of food trucks on the Island with an array of interesting food and drink.

Thanks for joining me on my tour of Governor’s Island. It’s a great place to get Busy In Brooklyn!

Governor’s Island is open from 10 AM – 7 PM every Saturday, Sunday and Holiday Monday (Memorial Day and Labor Day) through September 29.

Fore more info, visit GovIsland.com.

Other BIB getaway reviews:

Hershey, PA
Miami Beach, FL
Kelder’s Farm, Upstate, NY

Post a Comment

Fourth of July Tartufo

If you’re looking at the screen quizzically wondering what tartufo is, don’t worry. I didn’t know what it was until recently either! A few weeks ago, a few kosher bloggers and I went out to celebrate the anniversary of the Kosher Connection group. It’s a team of kosher food bloggers that joined together to help each other navigate the blogging world. If you follow my blog, you may have noticed our monthly link-up challenges.

We met at Siena’s restaurant in Brooklyn, to celebrate the partnerships and friends we have made over the past year. Siena served us a variety of dishes, sampling their Italian and Mediterranean cuisine. Some of the highlight dishes included their fried zucchini chips with homemade marinara, a medley of fresh salads, ravioli cooked to perfection and a standout tuna steak over white beans and spinach.

For dessert, we were served a tasting of their finest sweets including cheesecake, tiramisu and tartufo. I had to ask the waiter to repeat himself, as I’d never heard of it before. It was a layered ice cream dessert with marachino cherries and vanilla ice cream at the base and pistachio ice cream on top. It was served as a rectangular slice and drizzled with chocolate. The ice cream was delicious, but I couldn’t get over the pretty presentation. After a few hours milling over the tartufo concept (and browsing the internet for every tartufo recipe I could find) – I had a stroke of genius. Why not find blue maraschino cherries, and layer red and white frozen desserts in celebration of Independence day?

I was so excited about my idea that I went straight for the grocery in search of blue maraschino cherries. Little did I know that kosher ones are not that easy to find. So, I did what any idea-obsessed blogger would do…research. I found a kosher company that makes maraschino cherries in a variety of colors and I called them up. I asked where I might find the blue ones in Brooklyn, and they gave me two different locations. I was on it. The next day, I drove out to a shady little store on Coney Island and picked up my loot. I drove straight home, my ice cream already thawing on the counter.

When I uncovered my tartufo the next day, I never imagined it would turn out so pretty. Sure, it wasn’t perfect. The ice cream layers had sunken into each other, and the maraschino cherries peeked out a tad too little. But still. My experiment had worked. Wonderfully. Happy 4th of July!

1 year ago: snap pea, corn & red currant salad
2 years ago: grilled chickpea burgers

Post a Comment

3 Ways with Duck Sauce Chicken

Recently, I was given the opportunity to develop some recipes for the Joy of Kosher Gold’s Pure Foods Campaign. Being a huge fan of many of Gold’s products, I was right on board. While Gold’s is mostly known for their horseradish, they actually produce a wide variety of products including their fantastic wasabi sauce, bbq sauce, and my favorite, their amazing collection of duck sauces.

Since Gold’s duck sauce plays such a huge part in my recipes, I decided to do 3 ways with 3 different types of chicken, and 3 different types of Gold’s duck sauce. Fun, right? Gold’s actually makes 4 varieties of duck sauce including sweet & sour, spicy garlic, snappy ginger and hot & spicy. My husband is not a fan of spicy foods, so I knew just which ones to choose.

In the following post, you’ll find recipes for:

>Chicken wings, using snappy ginger duck sauce
>Chicken breasts, using sweet & sour duck sauce
>Whole chicken quarters, using spicy garlic duck sauce

I hope you enjoy my 3 ways with chicken and 3 different duck sauce varieties. Check out more Gold’s recipes on Joy of Kosher.

STICKY GINGER CHICKEN WINGS

For my first recipe, I decided to do a sticky ginger chicken wing recipe. This makes use of Gold’s delicious Polynesian style ginger duck sauce and brightens up the flavors with fresh ginger, garlic and soy sauce. If you’ve never tried fine shreds of fresh ginger in a sauce, you’re in for a huge surprise. Finely julienned threads of ginger, practically melt into the sauce, giving it a bright and refreshing finish.


First, I sear the chicken wings in sesame oil with a light ginger-scented coating. I saute some finely julienne fresh ginger and minced garlic, adding snappy ginger duck sauce, chicken stock and soy sauce, to create a delicious sticky coating. I bake the chicken wings with the ginger glaze until crisped around the edges. These chicken wings make for the perfect appetizer at your next dinner party!


For the complete Sticky Ginger Chicken Wings recipe using Gold’s Polynesian-style snappy ginger duck sauce, visit this post on the Joy of Kosher website.

SWEET & SOUR PINEAPPLE CHICKEN

For my next recipe, I decided to do a take on a classic Chinese dish – sweet and sour chicken. Growing up, my mom would often fry up shnitzel for dinner, always serving it alongside a bowl of Gold’s sweet & sour duck sauce for dipping. When I got older, and started eating out, I was shocked to find that all people did not eat their shnitzel that way! As an ode to my childhood, I prepared this dish shnitzel style, instead of in little nuggets. It saves you on frying (and calories!)

I started off this recipe with classic Chinese takeout food in mind, and I couldn’t believe just how close it came to the real thing. This dish tastes like a perfect cross between sesame and sweet & sour chicken. I started off sauteing some onion, pepper and pineapple chunks until tender. I fried up the shnitzel in a crispy tempura batter, and prepared a sauce with Gold’s Cantonese-style sweet & sour duck sauce, ketchup, brown sugar and pineapple juice.


For the complete Sweet & Sour Pineapple Shnitzel recipe using Gold’s Cantonese-style sweet & sour duck sauce, visit this post on the Joy of Kosher website.

SPICY GARLIC CHICKEN

Finally, for our last recipe, I’m bringing up a not-so-old recipe for spicy garlic chicken using Gold’s Oriental-style spicy garlic duck sauce. This recipe went viral on Pinterest (4500+ repins), when a famous Pinterest user repinned the recipe here. It has become my blog’s most popular recipe, and you’ll see why when you revisit the recipe here.

What is your favorite recipe using Gold’s duck sauce? Share it with me in the comments below!

Watermelon Limeade

There’s nothing like an ice cold cup of lemon or limeade to cool you off on a hot summer’s day. Summer, or winter, I’m a huge fan of citrus drinks, but all too often, I find that they are overly sweet. This lightly sweetened watermelon-limeade is reminiscent of agua fresca, a refreshing fruit-infused water drink popularized in Mexico . Aqua fresca is a terrific thirst quencher for summer picnics and barbeques.

For as long as I can remember, I’ve been wanting to set up a lemonade stand for my kids. So when I was testing this recipe for the blog, I knew just  what to do with my pitcher full of limeade. My girls couldn’t be more excited about their reenactment of one of their favorite books “Pinkalicious and The Pink Drink,” while my son stood by asking for continuous refills. I set my kids to work designing a sign for our table (isn’t it adorable?!) while I put together all the necessities. Since we used tiny little cups, we set our price at just 5 cents, a total steal for today’s economy!

We live on a very quiet block, with not much foot traffic, so my little ones grew increasingly sad as they waited for someone, ANYONE to buy a cup. With construction going on directly across the street, we were lucky enough to have the contractor buy a round for all of his workers. He generously gave my kids more than 20 cups worth of pay. After that, traffic picked up and thanks to the generosity of strangers and friends my elated children netted $6.51. That’s a whole lot of profit when you’re asking for a meager 5 cents a cup.

I’ll never forget the excitement and smiles on the faces of my children, and the pride they showed in their first business venture. Our pink lemonade wasn’t just a thirst-quencher. For two little girls in Brooklyn, it made a favorite book come alive and wishes and dreams come true.

1 year ago: smores chocolate toffee bark
2 years ago: salad nicoise

Post a Comment